> ## Documentation Index
> Fetch the complete documentation index at: https://docs.spirii.com/llms.txt
> Use this file to discover all available pages before exploring further.
# User management
> Invite colleagues and customers to Connect, scope which data they see, and set what they can do with roles.
Team Access is where you control who can use Connect, both your own colleagues and your customers, and what each person can see and do. You invite them, scope their access to the right data, and give them a role that decides which features they can use.
 ## Overview
Access in Connect has two independent dimensions, and every user has both:
| Dimension | What it controls | Set by |
| --------- | ----------------------------------------------------------------------------- | ------------------------------------------------------------- |
| Customer | **Data access**: which locations, tariffs, tokens, and records a user can see | The user's company and its position in the customer hierarchy |
| Role | **Feature access**: what a user can do with the data they can see | One or more of eight roles |
A user tied to a customer sees that customer's data; a colleague at your own company sees yours. Their role then decides whether they can only view it, edit it, or administer the platform. You find Team Access in the bottom-left of Connect, under your own name.
The customer side draws on the [Customers](/components/organisation/customers) model, where a user's company and the customers beneath it in the hierarchy set the boundary of what they can reach. This page is about granting people access within that boundary and choosing what they can do.
## Roles
A role sets which features and actions a user has across the data they can access. There are eight, ranging from Operator, which edits everything, down to narrow roles built for one job, such as Installer. A user can hold more than one at a time, and their access is the sum of them.
What each of the eight roles can do, side by side, and how to pick one.
### Who can assign which role
Roles sit in a hierarchy, and you can only assign a role at or below your own. An Editor can invite people as Editor, Supporter, User, or Viewer, but cannot make anyone an Operator — only an Operator can do that. The same limit applies when you change an existing user's role.
This is worth checking before you delegate user management. Handing someone Editor so they can onboard their own team means they'll come back to you every time a new Operator is needed.
## Inviting a user
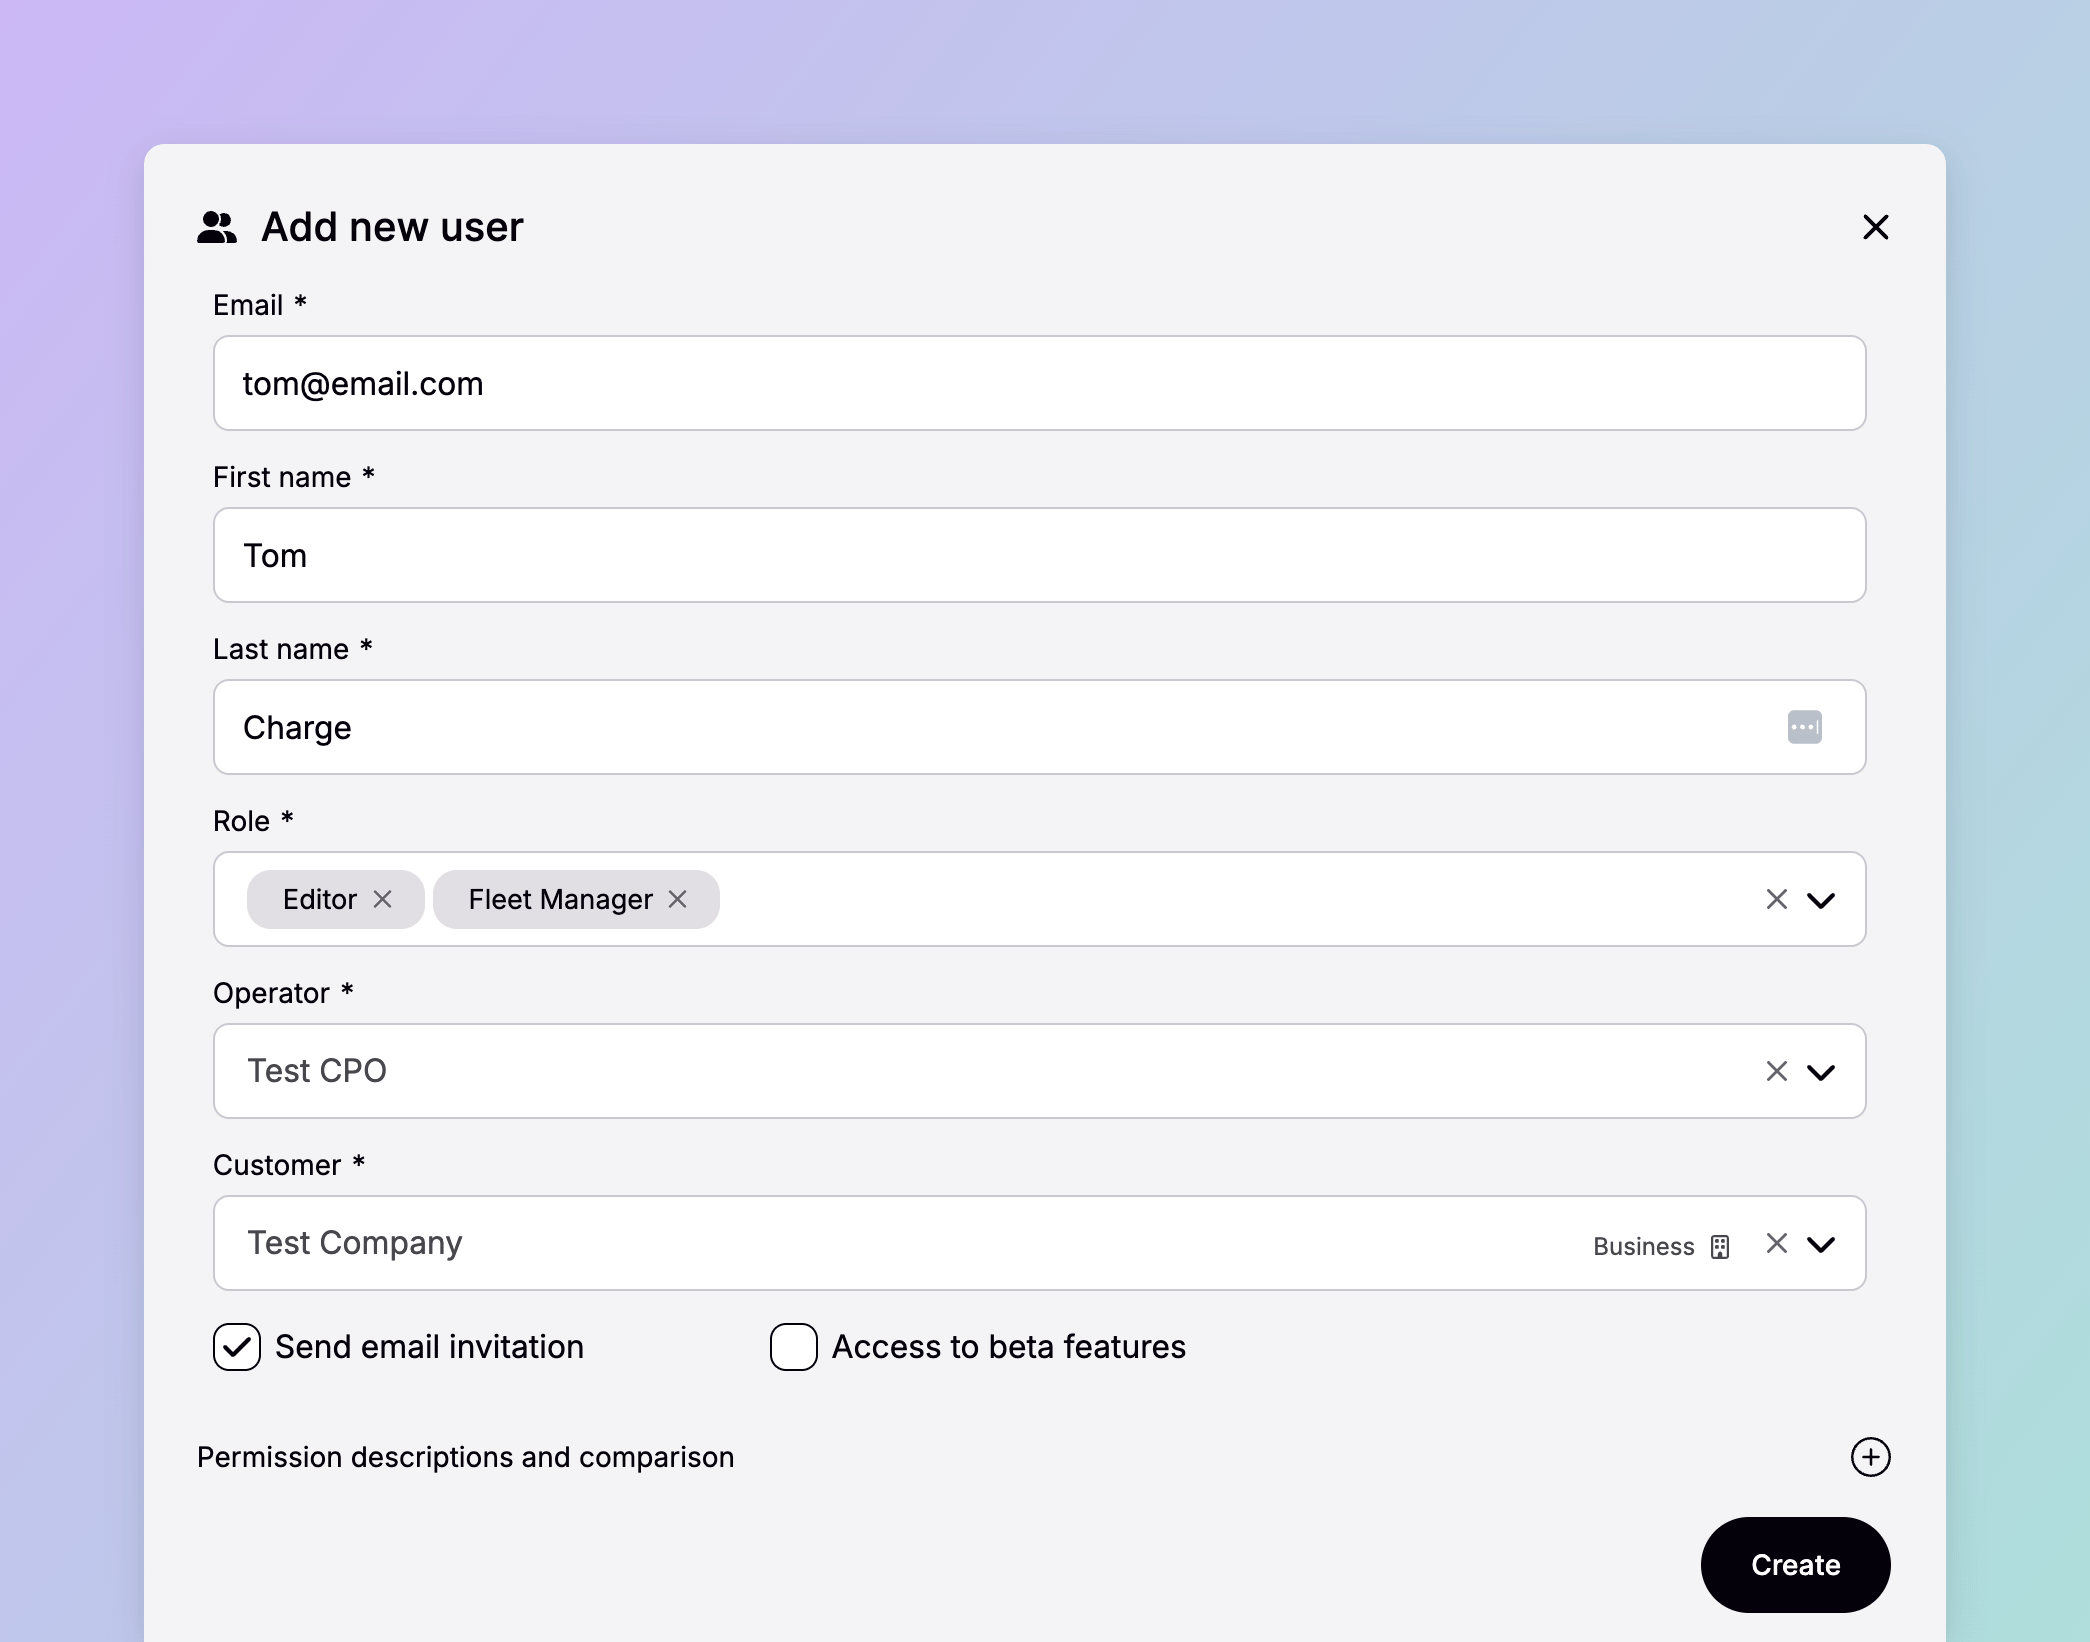
The same flow invites a colleague or a customer; the difference is which customer you scope them to.
In the bottom-left of Connect, click your name, then select **Team Access**.
Choose **Add new user** and enter their email address.
Leave the customer as your own company for a colleague, or set a specific customer, such as Acme Inc., to give their user access to only that customer's data.
Pick the role that matches what they need to do: a colleague running a site might be an Editor, a customer checking their own usage a Viewer. Where no single role fits, assign two — see [Roles](/capabilities/account/roles).
The user receives an email inviting them to set a password. On first login they'll also set up multi-factor authentication.
## Resetting a user's MFA
Multi-factor authentication is required for every Connect user. When someone loses access to their authenticator (a lost or replaced phone, or a reinstalled app), an **Operator** or **Editor** resets it from Team Access: find the user, open the actions menu, and choose **Reset MFA**.
Resetting MFA signs the user out of every active session, and they must set up MFA again with a new code on their next login. No notification is sent automatically, so tell them yourself, and verify their identity first, since a reset is what an attacker would want.
## Dependencies & limitations
* **Only Operator and Editor can change users.** Both can invite users, edit them, and reset MFA. A User can open Team Access and see who has access, but can't change anything. Every other role has no access to the page at all.
* **You can't assign a role above your own.** An Editor cannot create an Operator.
* **MFA can't be skipped.** Every user sets up multi-factor authentication on first login; it's mandatory.
* **Data access is bounded by the hierarchy.** A user can only ever reach data for their company and the customers beneath it; you can't grant access outside that boundary. See [Customers](/components/organisation/customers).
* **Invites expire.** An invitation needs to be accepted within a couple of days before it lapses and has to be resent.
## Related
What each of the eight roles can do, side by side.
The company hierarchy that sets the boundary of a user's data access.
Who can charge at a location, as opposed to who can administer the platform here.
What an invited user does to set their password and MFA and get into Connect.
## Overview
Access in Connect has two independent dimensions, and every user has both:
| Dimension | What it controls | Set by |
| --------- | ----------------------------------------------------------------------------- | ------------------------------------------------------------- |
| Customer | **Data access**: which locations, tariffs, tokens, and records a user can see | The user's company and its position in the customer hierarchy |
| Role | **Feature access**: what a user can do with the data they can see | One or more of eight roles |
A user tied to a customer sees that customer's data; a colleague at your own company sees yours. Their role then decides whether they can only view it, edit it, or administer the platform. You find Team Access in the bottom-left of Connect, under your own name.
The customer side draws on the [Customers](/components/organisation/customers) model, where a user's company and the customers beneath it in the hierarchy set the boundary of what they can reach. This page is about granting people access within that boundary and choosing what they can do.
## Roles
A role sets which features and actions a user has across the data they can access. There are eight, ranging from Operator, which edits everything, down to narrow roles built for one job, such as Installer. A user can hold more than one at a time, and their access is the sum of them.
What each of the eight roles can do, side by side, and how to pick one.
### Who can assign which role
Roles sit in a hierarchy, and you can only assign a role at or below your own. An Editor can invite people as Editor, Supporter, User, or Viewer, but cannot make anyone an Operator — only an Operator can do that. The same limit applies when you change an existing user's role.
This is worth checking before you delegate user management. Handing someone Editor so they can onboard their own team means they'll come back to you every time a new Operator is needed.
## Inviting a user
The same flow invites a colleague or a customer; the difference is which customer you scope them to.
In the bottom-left of Connect, click your name, then select **Team Access**.
Choose **Add new user** and enter their email address.
Leave the customer as your own company for a colleague, or set a specific customer, such as Acme Inc., to give their user access to only that customer's data.
Pick the role that matches what they need to do: a colleague running a site might be an Editor, a customer checking their own usage a Viewer. Where no single role fits, assign two — see [Roles](/capabilities/account/roles).
The user receives an email inviting them to set a password. On first login they'll also set up multi-factor authentication.
## Resetting a user's MFA
Multi-factor authentication is required for every Connect user. When someone loses access to their authenticator (a lost or replaced phone, or a reinstalled app), an **Operator** or **Editor** resets it from Team Access: find the user, open the actions menu, and choose **Reset MFA**.
Resetting MFA signs the user out of every active session, and they must set up MFA again with a new code on their next login. No notification is sent automatically, so tell them yourself, and verify their identity first, since a reset is what an attacker would want.
## Dependencies & limitations
* **Only Operator and Editor can change users.** Both can invite users, edit them, and reset MFA. A User can open Team Access and see who has access, but can't change anything. Every other role has no access to the page at all.
* **You can't assign a role above your own.** An Editor cannot create an Operator.
* **MFA can't be skipped.** Every user sets up multi-factor authentication on first login; it's mandatory.
* **Data access is bounded by the hierarchy.** A user can only ever reach data for their company and the customers beneath it; you can't grant access outside that boundary. See [Customers](/components/organisation/customers).
* **Invites expire.** An invitation needs to be accepted within a couple of days before it lapses and has to be resent.
## Related
What each of the eight roles can do, side by side.
The company hierarchy that sets the boundary of a user's data access.
Who can charge at a location, as opposed to who can administer the platform here.
What an invited user does to set their password and MFA and get into Connect.